The first thing I noticed is that the side panel has a very nice plexiglas window. This opens the door to all kinds of lighting and cool additions. I decided that today I would add some LED's around the edge of the plexi, which I will etch later.
Project: LED Lighting
LED's

I will be using some red 2 volt led's that I got in a box of random parts from www.goldmin-elec.com (AWESOME place. Go visit it. Now.)
Power Cable

This is just a standard molex connector to get 12 volts (Red to black) and 5 volts (Yellow to black) I cut this off of a cheap case fan.
Resistors

This is a 500 ohm 1/2 watt resistor. You can get them from mouser or digikey for about 3 cents apiece. It stops the LED's from committing over-amperage suicide.
Wire Clippers

These clip wire.... Get some.
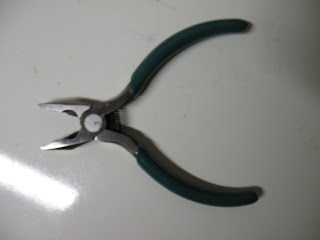
Pliers

I don't really need these, but the make bending the wire around the leads of the LED, and thus soldering, much easier.
Solder Sucker

Unless you are perfect at soldering, get one of these. They literally suck the excess solder off of the circuit board, and correct your inevitable mistakes.
Solder Gun and Solder

Soldering, people! You'll need some way to make the electrical connections, and this is my favourite method. It can take practice, but is well worth the effort.
Multimeter

This is a fairly cheap multimeter from Harbour Freight. They were on sale and I just loaned out my other one. Pretty good for $3.
Wire

I am using 20 AWG wire, but you can use whatever suits you. I try to color code the pictures, but sometimes I mess up the system. (Red = +12, Black = 0, Green = +5)
First, I glued on the LED's. I used some kind of High temp glue... stuff. Anyway, It fell apart half way through soldering everything, so the stuff is only barely hanging on. I will re-glue everything with hot glue as soon as I get some more.

Next, I started to solder them together. I soldered all of the LED's on the top in series, then connected the ends of that in parallel with the bottom(also in series). The sides have two LED's each, and are arranged much like the top and bottom. The side is in series across itself, and parallel to the other side. The sides will connect to the five volt rail, and the top and bottom to the twelve volt rail.
Now I started to solder away. I connected all the sides, making sure there were no shorts along the way.

With the bulk of the soldering out of the way, I can finally move on to... more... soldering... More on this tomorrow, I have to take a break, and I don't have anything else to do tomorrow anyway.
No comments:
Post a Comment